If you're looking for a blank CMR form or an example of how to fill one out, you'll find it in the guide CMR consignment note: template and how to fill it out, where you can download the form as a PDF.
CMR forms from your own Word template
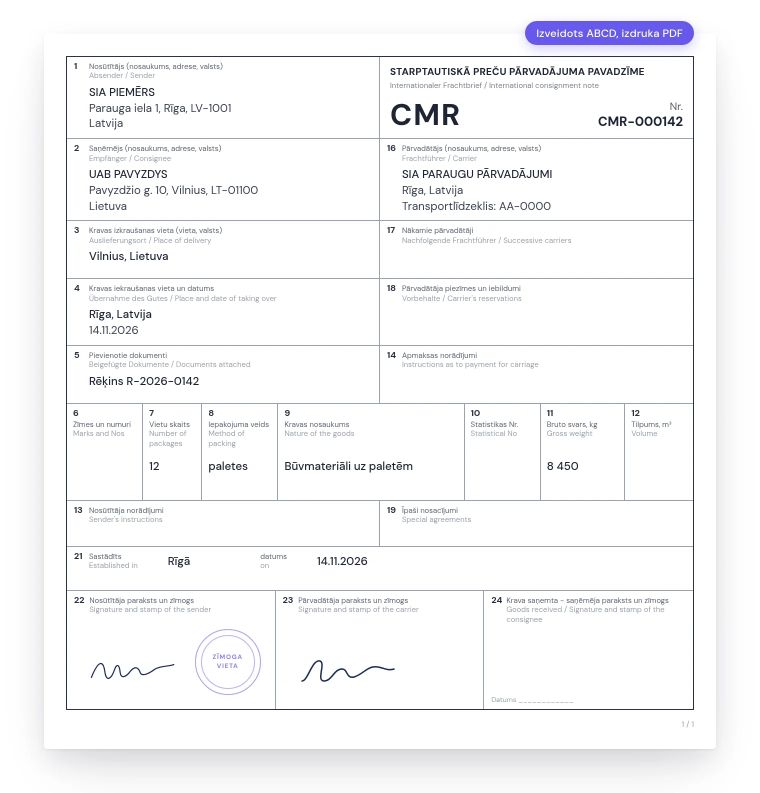
In the CMR module, you print the consignment note from your company's own CMR print template. The template is an ordinary Word file with placeholders in the right places, and your company administrator uploads it in the settings. That way the printout keeps your logo and the layout you already use. Once the CMR is closed, the "Print PDF" button opens it in a preview, and the "Print Word" button downloads a .docx file.
How ABCD fills in the CMR with your data
You don't have to start a new CMR from a blank page, because some of its fields are already filled in. You pick the customer from the Customer and product database module, and the customer's details are printed on the consignment note, while in the sender box of the template you insert placeholders for your own company's details. You enter the carrier, the place of issue, the places of loading and unloading and the goods description once in the module settings, and they are already filled in on every new CMR, so you don't have to type them in again each time.
All you have to do is check the goods description, enter the weight and add the truck and its number. If a load is carried by a different carrier, you change the carrier only on that load's consignment note.
CMRs and invoices in one place
While the CMR is open, you attach the closed sales invoices that travel with this load, and their numbers are printed on the consignment note. Each invoice can be attached to only one CMR. Once the CMR is closed, a "CMR #" link appears next to each attached invoice in the sales invoice list, so the accountant can see right away which load the invoice went out with.
You issue invoices in the Invoicing module, keep your customers in the customer database and make out CMRs in the same place, so everything is in one cloud system. There is nothing to install and no data to move from one program to another.
CMR numbering and change history
You no longer have to keep track of CMR numbers in a separate spreadsheet. The "Add number" button gives the CMR the next number from your CMR numbering series, and after that the number can't be overwritten by accident.
Once the CMR is filled in, you close it with the "Close" button: you can print a closed CMR, and it can no longer be changed by accident. If something does need fixing after all, you can reopen the CMR, and later the "History" tab shows who changed, closed and reopened it.